

The first thing you have to press is the Premiere Adobe button. When you press the button you have to start a new project and give it a name.

Before pressing the OK button you must always double check the General settings. After checking the settings press ok and this will appear. Give it a sequence name and press ok again.

This will appear after making a new project. Three windows and one time line. The top left-hand window is called the “Preview Window”. The one next to it is called “Output Window”. The long button one is called Timeline.
Some shortcut are the space bar is to play. Right arrow key to go forward frame by frame. Left arrow key to go back frame by frame.

2. Import Footage
To import footage you have to click on the File button at the top and scroll down until you see the import button, click and a look for your clips or footage. You may have to wait for a bit but make sure its loads.


3. Using Video Transitions
This window is where we can find a footage. The Footage Browser here you can find all your effects and clips.
The video transitions I like to use most is Dissolve. The others are more cheesy for an example it the film star wars all those cheesy transitions.
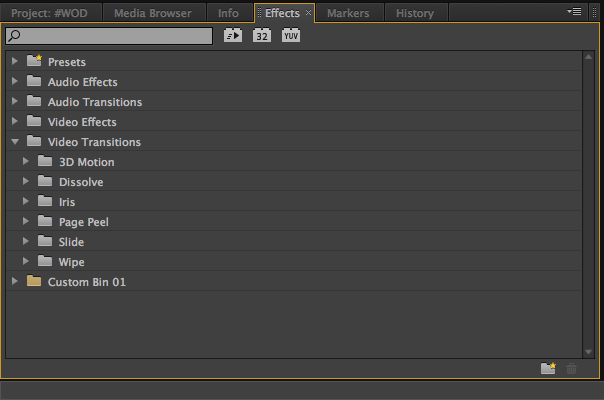

The way you put the transitions is simply drag it where you want it.

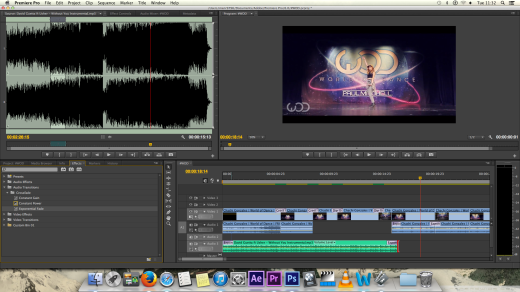
4. Audio Transitions
Video and Audio transitions are pretty much the same thing. It just that Audio transition have less then video. To place your audio transition is to drag it and place it on the audio.


In the above picture you can see the audio transitions. (Red line)
5. Using In and Out Points

The In and Out points is where you can choose a specific parts of the footage and not have all of it. Mark In (I) and Mark Out (O) choose the start and end of the clip.
5. Using multiple videos on the screen at the same time.

It may look difficult but its quite easy when you get used to it. The first thing you have to do is chose two pieces of footage. Double click on in when shown on the Output Window. Change the size and place where you want. Do the same thing with the other piece of footage.
6. Using Audio
Import the audio you want and use the Mark In (In) and Mark Out (O) to chose the specific part of the sound. Drag the sound to the TimeLine and if you want to put effects, go to the effect box and choose whichever you want.


Very Good work Rebeca. I will give your some guidance in your review on how to achieve top grades. Keep it up.
Mark